
New to kombucha? Here are the juicy details all about it:
Kombucha tea is made by adding the colony to sugar and black or green tea, and allowing the mix to ferment. The resulting liquid contains vinegar, B vitamins and a number of other chemical compounds. This sweetened black tea is fermented by a symbiosis of bacteria and yeast embedded within a cellulose membrane (SCOBY). It is considered a health drink in many countries because it is a rich source of vitamins and may have other health benefits. It has previously been reported that adding lactic acid bacteria (Lactobacillus) strains to kombucha can enhance its biological functions.
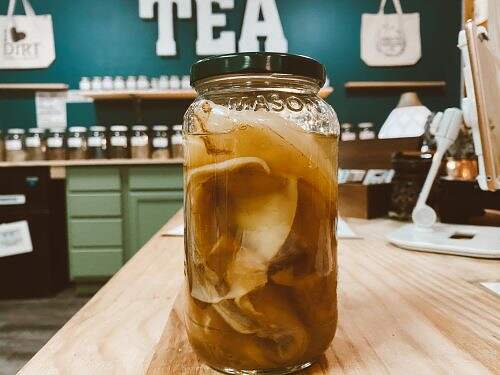
What Is a Kombucha SCOBY?
SCOBY stands for “symbiotic culture of bacteria and yeast.” It is an ingredient used in the fermentation and production of kombucha. It’s a thick, rubbery and cloudy mass that aids the fermentation process.
Where can I get a SCOBY?
Jamie often bring hers in the store for others to take home. She gets 2 new SCOBY’s each time she makes them so there is often one around – just reach out if you are local and would like one!
Why we love kombucha.
Great for the gut
High in antioxidants
Can kill bad bacteria in the body
May reduce heart disease risk
Helps treat all sorts of chronic health problems

What is the fermentation process of kombucha?
Historically the fermentation technique was used as a way of preserving foods and drinks long before the days of refrigeration. During the process of fermentation, microorganisms such as bacteria, yeast, or fungi convert organic compounds, such as sugars and starch, into alcohol or acids. The consumption of foods and drinks that have undergone fermentation contain benefits to our health far beyond food preservation. The transformation of sugars and starches enhances the natural, beneficial bacteria in food. These bacteria, known as probiotics or good bacteria are thought to help a multitude of health issues, specifically digestive health. The bacteria that live in our gut are essential to our overall health. They help with the digestion, absorption, and assimilation of our nutrients. Plus, they play a role in the function of our immune system.
However, there are bad bacteria that also reside in the gut, and of course, the challenge is achieving the right balance between the two. When the balance is shifted in favor of the bad bacteria, symptoms may arise such as bloating, constipation, or diarrhea. This is termed dysbiosis, (also called dysbacteriosis) the state in which the gut flora are out of balance. Also known as a microbial imbalance or maladaptation on or inside the body, such as an impaired microbiota. Fermentation can also increase the availability of vitamins and minerals for our bodies to absorb. Additionally, by boosting the beneficial bacteria in your gut, you are promoting their ability to manufacture B vitamins and synthesis vitamin K.
Connection Between the Gut and Immune System
The gut houses a large proportion of the immune system. By consuming probiotic-rich foods, you are supporting the gut lining as a natural barrier, making the immune system more robust. A lack of beneficial bacteria allows disease causing microbes to grow causing inflammation in the gut wall. If you have recently taken a course of antibiotics, probiotic foods are particularly helpful in the restoration of your gut.
The gut and brain are linked, through the hypothalamic-pituitary-adrenal (HPA) axis. Technically called the enteric nervous system, the gut is lined with neurons that can influence our emotions and feelings. Serotonin, a neurotransmitter involved in mood, is made in the gut and research further suggests that as probiotic bacteria contribute to a healthy gut, they are also linked to a healthy mind. The increasing application of fermented foods is further promoted by recent evidence on their health benefits, beyond the traditionally recognized effects on the digestive system. With recent advances in the understanding of gut-brain interactions, there have also been reports suggesting the fermented food’s efficacy, particularly for cognitive function improvements.
Making your own kombucha
When you are ready to use your kombucha starter, prepare your tea as described in the recipe below. When your tea has cooled, place the entire contents of the bag into your gallon jar. The starter tea is the most important part of the process and is actually more important than the SCOBY. The more starter tea you use, the faster your tea will brew.
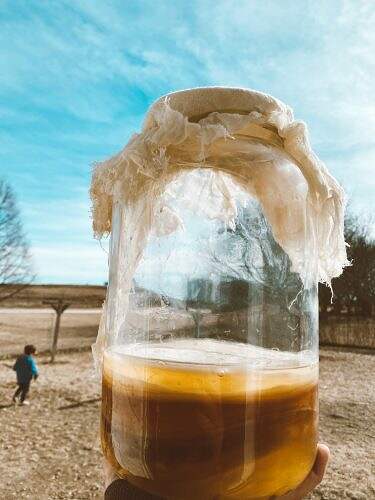
Your SCOBY might sink or it might float as it ferments. You should see a new SCOBY forming at the top of your jar – it is not mold, it is the new SCOBY forming. The only time to be concerned is if you see something fuzzy or hairy growing on the surface of your fermenting tea. Mold may appear if you have mold in your home, or you may not have it in a well-ventilated area. If you see dark brown spots or long stringy things on your SCOBY or in your tea, there is no need for concern, this is normal. These are good yeast cells that help ferment and make your tea.
Always ferment kombucha in a well-ventilated area, not in a closet or cupboard.
You can keep your old SCOBYs in your latest brew or remove them. Always use the newest SCOBY and if you don’t have room in your jar to keep the others, you can add them to your compost pile (or your plants love them too!). One SCOBY is enough – the starter tea is the most important thing that will determine how fast your kombucha will brew.
Recipe Notes:
Always leave enough starter tea (at least a cup) from your last batch to make a new batch of kombucha. Each time you make a new batch of kombucha. Each time you make a new batch of kombucha, a new SCOBY should form on top. If it doesn’t form, or if turns out very thin, it’s usually because it’s too cold in your house. (Which is why we recommend the heating strip.) Use the newest SCOBY that forms for your next batch. It is okay if you want to cut up your SCOBY. You only need a small piece for the next batch. Just don’t forget the starter tea! Remember, it is more important than the SCOBY!
It is normal for your kombucha to get dark spots or weird stringy things. These are just yeast cells, which are harmless. Many times people will see what they think is mold growing on their kombucha, but it is really just the new SCOBY forming.
How to Make Kombucha
Time required: 6-15 days
What you will need:
- Gallon glass jar or non-lead-based crock to be used as your fermenting container
- Linen or cloth napkin that will fit completely over top of jar
- Rubber band to go around neck of the jar
- 1 cup sugar (organic cane)
- 4-5 tea bags or 1Tbsp loose tea (you can use black or green, organic is best)
- 3 quarts (12 cups) filtered water (not distilled)
- Slotted spoon to remove tea bags and stir sugar
Kombucha making steps:
- Gather your ingredients and materials to make kombucha.
- Boil three quarts (12 cups) of filtered water, then add 1 cup of sugar. Stir until sugar is dissolved.
- Turn off heat and add 4-5 tea bags or loose tea. Steep 10-15 minutes. (It doesn’t hurt to steep the tea longer if you like a stronger flavor.) Then remove tea bags and allow the tea to cool.
- Pour cooled tea into your gallon size glass container.
- Add the kombucha starter – both the SCOBY and the starter tea. (the starter tea is simply 1 cup of already made kombucha from a previous batch.)
- Place a cloth over the opening of the jar and secure with a rubber band. This keeps mold, dust, spores, and vinegar flies out of the fermenting tea, while allowing the kombucha to “breathe.” Let sit on your counter (out of direct sunlight) for 6-15 days. Kombucha likes to be around 83 degrees, so it is highly recommended to wrap a heating strip around your jar to keep the temperature stable. www.culturedfoodlife.com has these to purchase. Wrapping in towels seem to work well too.
- Do a taste test at around day six. Stick a straw along the inside of your jar, then put your finger over the top of the straw and draw some out. (Plastic or silicon is recommended)
You should expect results like this:
- 4-6 days – too sweet, not all sugar has been converted.
- 7-9 days – tastes like sparkling apple cider.
- 10+ days – vinegar taste becomes prominent
The kombucha is ready when it has just a hint of sweetness left, but mostly tastes like sparkling apple cider vinegar. When the kombucha is brewed to your taste, pour it into glass bottles, leaving about an inch at the top, and cap. Place in the refrigerator. This can now be second fermented with juices, but is delicious as is. Puree kiwi or berries or add in juice of choice.
Jamie’s quick breakdown of how she makes hers:
Start with 4 cups of water. Pour 2 cups into a pan and bring it to a boil. Add 4 to 5 tea bags to the water. I personally prefer organic black tea but do love a soft green occasionally for even more health benefits. Now heat the water and tea bags allowing it to come to a boil then turn it off. Let the tea bags soak for about 10 minutes before removing and straining them.
Add 1 cup of organic cane sugar to the water and let it dissolve for a few more minutes. When adding to your gallon jar, I take 2 cups of of the tea made and add to 2 more cups of cool water (so it’s not hot going into the jar) and do that until the tea is gone. (Totaling 12 cups of water or less depending on what is already in the gallon jar.)
Cover it with cheese cloth and a rubber band. The mesh covering is for ventilation and then store in a dry dark place with plenty of ventilation. It takes kombucha about 1 week to 14 days depending on if you want it sweeter or more acidic to brew. Then you can flavor it by making a tea, pureeing some fruit or using just some regular juice.
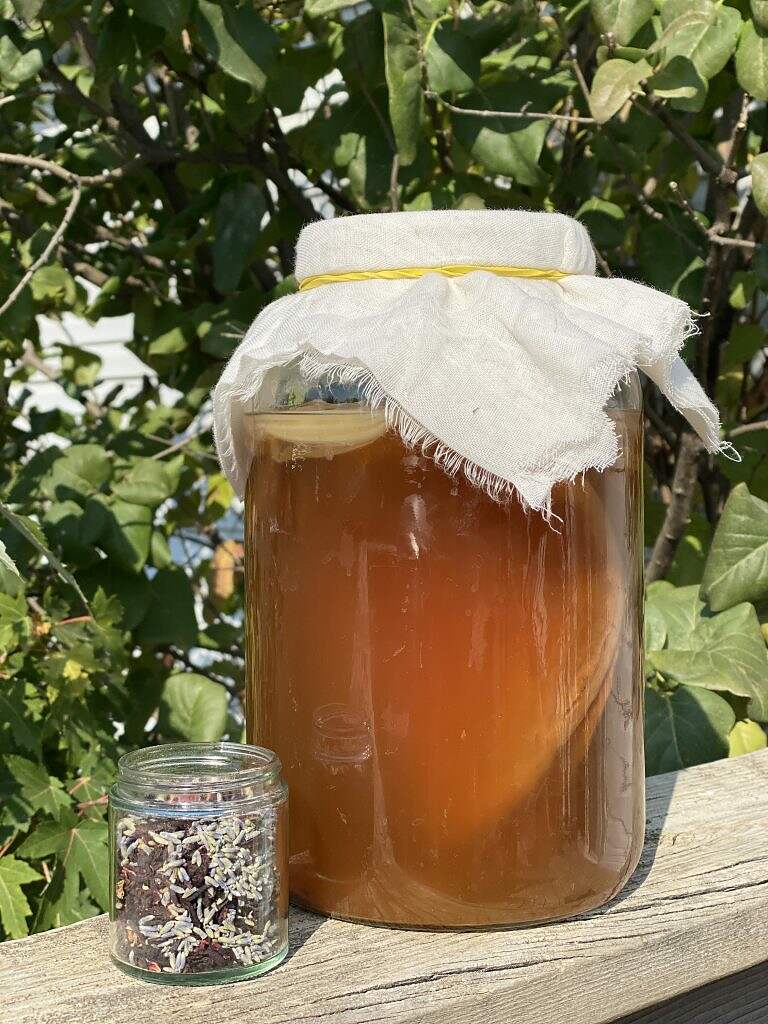
To flavor, you’ll fill a bottle about ¾ of the way full and then flavor it with whatever you would like to fill the rest of the bottle. Let those sit out. I usually just put them right in the refrigerator. If you choose to flavor you are supposed to let them sit out for a few more days and that’s how the carbonation will form. I make one of my herbal tea blends or blend up kiwis and add those as well. Ginger, hibiscus, lavender, or Summery Shade are some faves in my home!
Sources:
Healthline
NCBI
NCBI
Jamie Vess